PLATE II Solvent-bound dye class

Ink & Pen.

Just found ink on the sofa? Take a breath before you reach for anything.

A pen line is rarely what ruins the leather. It is the wipe, the spray, the scrub in the first thirty seconds that turns a stain into damage. Slow down, and most ink lifts.

Time 30-60 min Materials Rs 250-600 Skill Beginner / Intermediate

Here is the honest version. Most ink marks on leather are recoverable if you act in the next hour, and most permanent damage comes from the first thirty seconds of panic, not from the pen itself. The protocol on this page is the same one we use in our own studio. Read it through once before you touch anything. You have more time than you think.

Solvent-Bound Dye Fast-Setting Polymer Carrier Grain Penetrating
Risk to Leather High
Action Window 15 min act within
DIY Success Rate 72% when caught early
Specimen plate close-up of fresh ballpoint ink line on tan aniline leather seat-back, daylight, with cotton swab nearby PLATE II - SPECIMEN
01 Solvent halo - dye has migrated 2-3 mm beyond the visible line
02 Topcoat penetration deepest where pen pressure was greatest
03 Cotton swab, not cloth - smaller surface, better control of dye lift
i Time-Sensitive Within 15 min Solvent dyes set as they dry
ii Leathers At Risk Aniline highest Pigmented forgives - aniline does not
iii Difficulty Moderate Patience over force, swab over cloth
iv Reversibility Partial Full restoration via studio dye-correction
Q1

Will it stain permanently?

Almost certainly not, if you act in the next hour. Pigmented leather, which is what most modern sofas are, usually comes fully clean. Semi-aniline recovers most of the way. Aniline is the one hard case, and even there partial recovery is the norm.

Q2

Can I use water?

Not yet. Water will spread the dye outwards and push it deeper into the leather. You will use water, but only at Step 4, as a final neutralising wipe, never as your first move on fresh ink.

Q3

Should I wait or act now?

Both. Act now, but slowly. Blot first, then patch-test before any solvent goes near the visible cushion. Two careful minutes with a cotton swab are worth more than thirty seconds of panic with a wet cloth.

The Leather Restorators - cotton swab work on tan leather, daylight
Plate II - Field Notes The First Hour

Most ink lifts when
the hand stays calm.

Half the damage we see at the studio came from the wipe, not the spill. White cotton, twenty seconds of stillness, no panic, and most stains never reach our bench at all.

Photographed in studio - Faridabad
Section 01 - Identification

Reading the line. Is it really ink?

Half the "ink stains" people send us turn out to be something else, denim dye, food, newspaper transfer. A thirty-second look before you start saves the wrong cleaner from making the wrong stain permanent.

Visual & Tactile Signs

  • A

    Linear, not blotchy

    True ink draws a line - sharp where the pen tip pressed, fading where it lifted. A round dark spot is more likely shoe polish, food, or transferred dye from clothing.

  • B

    Halo on aniline, edge on pigmented

    On aniline leather you will see a soft 1-3 mm halo of feather-bleed where solvent carried dye into surrounding fibres. On pigmented leather the line stays sharply edged because the topcoat blocked migration.

  • C

    Cool, slightly waxy under fingertip

    Fresh ballpoint feels faintly waxy when you pass a clean fingertip lightly across it - residual paste binder. Dried ink loses this and sits absolutely flat with the surface.

  • D

    Colour shift in oblique light

    View the mark from a low angle in daylight. Ink looks slightly more violet or bronze than printed - a tell-tale of metallised dye complexes used in modern pen formulations.

Often Confused With

  • Denim dye transfer Diffuse blue cloud on cushion fronts. No sharp line, no halo. Lifts with leather cleaner alone - alcohol is overkill.
  • Newspaper / printer transfer Mirror-image of text or images. Picks up off pigmented leather with a plastic eraser; resists alcohol because it is oil-based.
  • Dark food spill (soy, balsamic) Glossy when fresh, brown not blue when dry. Smells. Wants distilled water and a pH-neutral cleaner, not solvent.

Identifying ink correctly matters because the wrong protocol on the wrong stain compounds damage. People reach for alcohol on a denim transfer and lift the leather pigment along with the dye - now they have a halo where there was just a smudge. Baby wipes do the same thing on every stain class, which is why they sit at the top of every "never-do" list in this Atlas.

If you can lift a corner of the cushion and check the underside of the affected panel before you start, do. Compare colour, sheen and grain. The hidden side is your reference for what success looks like - and your patch-test surface for the next step. A short read on hide anatomy makes the rest of this page click into place.

Section 02 - Chemistry

Why ink loves leather. A solvent story.

Modern pen ink is engineered to bond with paper fibres in milliseconds. Leather grain is denser than paper but chemically not that different, so the dye behaves the same way. Knowing what is happening underneath is half of why the protocol works.

Family - Solvent-bound dye

Ballpoint paste is roughly forty percent dye, thirty percent fatty-acid solvent, and the rest resin and surfactant. The moment it hits a porous surface, the solvent runs ahead and drags the dye along behind it through capillary action. On leather, that path runs along the channels between collagen fibres, a network of microscopic tubes that pull the dye away from the surface you are trying to clean. This is also why patience works better than pressure here, you are coaxing the dye back out of those channels, not scrubbing it off the top.

Gel pens make it harder. The "gel" is a water-based polymer that suspends pigment particles, and those particles bond to the leather's finish coat or grain layer mechanically rather than chemically. Mechanical bonds resist alcohol but yield to gentle, repeated abrasion. That is exactly what the swab-and-roll technique in the protocol below is doing.

Permanent markers are a different problem again. They use xylene or alcohol as a carrier, and the dye is a lipid-soluble metallised complex that bonds directly with the topcoat polymer. That is why most marker stains end up needing a pigment touch-up rather than a clean. The worst case is old-school India ink (carbon black in shellac), where the shellac fuses with the finish coat and the only honest answer is studio dye-correction.

Composition Dossier

Stain class
Solvent-carried dye
Solubility
Polar solvents (alcohol)
Sets to leather via
Capillary migration + polymer bond
Volatility
Low - dye stays after solvent flashes
UV behaviour
Fades to brown over months
Time to permanence
15-30 min on aniline
The Leather Restorators - inspecting an aged leather seat-back at a Delhi NCR home
Issue - 042 - MMXXVI Time, Treated as a Tool

The dye is still moving.
Slowing it is the work.

Solvent inks travel for fifteen minutes after they land. Stop the migration first; the lifting is the calmer half of the protocol that follows. Patience is not waiting - it is technique.

Photographed on site - Delhi NCR
Tyson - Lead Artisan Hands-on leather restoration since MMXII - 14 years on the bench, Faridabad
Section 03 - First Sixty Minutes

The first hour does most of the work.

Ink keeps moving for the next fifteen minutes while it is still wet. The only thing you have to do right now is slow it down. The lifting comes after, and it is gentler than you think.

  1. 0-2 min

    Stop and look

    Do not reach for anything wet yet. Take a daylight photograph from two angles, this is your reference for "before". Then run the thirty-second self-test in Section 06 to find out whether your leather is aniline, semi-aniline, or pigmented. Everything else depends on this answer.

  2. 2-15 min

    Blot, do not rub

    Press a clean white cotton cloth straight down on the ink. Lift it, rotate to a fresh dry section, press again. Each press takes roughly fifteen percent of the wet dye away with it. Keep going until the cloth picks up nothing more. This single habit, blotting instead of wiping, is what most people get wrong in the first thirty seconds.

  3. 15-45 min

    Patch-test, then lift

    Try 70 percent isopropyl on a hidden patch first (full method in Section 04). If it passes, work the visible mark with cotton swabs, dabbing from the outside edge inward. The moment a swab picks up any blue or black, throw it away and pick up a fresh one. A coloured swab will redeposit dye every time it touches the leather.

  4. 45-60 min

    Neutralise, then walk away

    Wipe the worked area once with a barely-damp cloth dipped in distilled water. Pat it dry with fresh cotton. Then walk away for thirty minutes. Do not poke at it, do not condition yet, the leather is still settling and will look darker than it actually is.

Cracked, dried-out leather where a household solvent stripped the finish coat
!

Never Do This

These cause damage that the stain itself never would. Skip them, even if the internet swears by them.

  • xHairspray. The plasticisers and fragrance bond into the topcoat and leave a sticky halo that attracts dust forever.
  • xNail polish remover or acetone. They strip pigment and finish in seconds, leaving a pale crater bigger than the original stain.
  • xMagic Eraser / melamine foam - read the why before you reach for one.
  • xBaby wipes. Surfactants lift surface pigment along with ink, smearing the stain larger.
  • xHairdryer or sunlight to "speed-dry". Rapid drying cracks the finish coat permanently.
  • xRubbing back-and-forth. Every stroke spreads dye and abrades grain. Always lift and dab, never drag.
A clean cotton swab being lightly dabbed against tan leather, the calm first response
+

Always Do This

A calm first response. Buys you the time to do this properly.

  • .Photograph the stain in daylight before you touch it - reference for after.
  • .Identify the leather type using the 30-second self-test in Section 06.
  • .Patch-test any solvent on a hidden seat-back patch for ten minutes first.
  • .Use cotton swabs, not cloth, on visible ink. Smaller surface, finer control.
  • .Work outside-in. Always toward the centre of the mark, never outward.
  • .Rotate to fresh swabs constantly. A coloured swab redeposits dye instantly.
Section 04 - Removal Protocol

Six steps, in order. Take them slowly.

These steps assume 70 percent isopropyl alcohol on a non-aniline leather. If the patch-test fails, and on aniline it usually does, stop here and read Section 07. Handing the job over is not a failure; on the wrong hide it is what saves the leather.

Your stain is

Fresh - Run all six steps in order. Most fresh ballpoint and gel ink lifts to acceptable on semi-aniline and pigmented leather within 30 minutes.

Dried - Skip Step 1 (blotting wet dye is irrelevant). Spend longer on Step 3 with patient, repeated swab dabs. Expect partial recovery - 60-70 percent on pigmented, less on aniline.

Set - Step 1-2 will not help; Step 3 risks lifting pigment without removing dye. Stop and photograph. Set ink almost always needs studio dye-correction. Send the photograph for a free assessment.

  1. 01 2-5 min Fresh ink only

    Blot the wet ink on contact

    Folded white cotton cloth pressed straight down onto a fresh ink line on tan leather, daylight

    Press a clean white cotton cloth straight down on the ink. Do not rub, smear, or drag - that spreads the solvent further into the grain. Lift, refold to a dry section, press again. Repeat until a fresh press picks up nothing on the cloth. You are removing surface-wet ink before it migrates further; expect to lift roughly forty percent of the visible mark this way.

    Tools - White cotton cloth (or kitchen-roll folded thick), clean dry hand Coloured cloths can transfer their own dye - use white only.
    If it didn't work

    If the cloth keeps lifting ink after ten presses, the stain is wetter than expected (gel pen or a fresh leak). Switch to a thicker pad of folded paper towel under firm dead weight - a hardback book - for two minutes. Then resume.

  2. 02 10 min Fresh + dried

    Patch-test isopropyl on a hidden patch

    Cotton swab applying a coin-sized drop of isopropyl alcohol to the underside of a leather seat-back panel

    Choose a hidden patch on the back of the seat-back, under a cushion, or behind the skirt. Dab a coin-sized drop of 70 percent isopropyl alcohol with a cotton swab. Wait ten minutes by the clock. Inspect: if the patch dulls, lifts colour onto the swab, or leaves a darker halo, stop here - your leather is aniline or has a delicate finish, and the protocol below will damage it. Send a photograph and stop.

    Tools - 70% isopropyl alcohol, cotton swab, timer Do not skip the ten-minute wait. Damage can take eight minutes to surface.
    If it didn't work

    If the patch passes but the leather looks slightly drier where you tested, you can still proceed - just plan to recondition more thoroughly at Step 6. If colour transferred onto the swab, this protocol is wrong for your leather. Skip to Section 08 (Hide Matrix) and read your row for the right next step.

  3. 03 10-20 min Fresh + dried

    Lift the dye with cotton-swab dabs

    Cotton swab dabbing at outer edge of a faded ink mark on tan leather, swab tip showing transferred blue dye

    Damp a fresh cotton swab in 70 percent isopropyl - not soaked, just damp enough that no liquid drips. Place the tip at the outer edge of the stain. Roll the swab across the surface in three to four millimetre dabs, working inward toward the centre of the mark. The instant any blue, black or red transfers to the swab tip, throw it away and pick up a fresh one. Never re-touch a coloured swab to the leather - you will redeposit dye every time.

    Tools - Cotton swabs (a full pack of 100), 70% isopropyl, small dish Outside-in only. Dabs, not strokes. Rotate swabs constantly.
    If it didn't work

    If after twenty swabs you have lifted no further dye but the mark is still visible, you have hit the limit of what isopropyl can recover. Do not increase pressure or switch to a stronger solvent. Stop, complete Steps 4-6 to protect the leather, then photograph and send for studio dye-correction quote.

  4. 04 3 min Always

    Neutralise with distilled water

    Barely-damp white cloth wiping the cleaned area in one direction, slight sheen visible

    Damp a fresh white cotton cloth with distilled water - barely damp, not wet. Wipe the worked area once in a single direction. This carries away alcohol residue before it has time to dry the topcoat further. Do not flood the leather, and do not wipe back-and-forth - that abrades the now-vulnerable surface. Tap-water is fine if distilled is unavailable, but distilled avoids any mineral scale on dark hides.

    Tools - Distilled water, fresh white cotton cloth One pass only. Multiple wipes lift more pigment than you realise.
    If it didn't work

    If the leather looks blotchy or uneven after neutralising, that is normal at this stage - wet leather is always darker. Wait until Step 5 finishes drying before judging. If blotchiness persists after full dry, you have surface pigment lift, not residual alcohol; condition heavily at Step 6 and reassess in 24 hours.

  5. 05 30+ min Always

    Dry slowly at room temperature

    Sofa cushion sitting in indirect daylight, fan and hairdryer crossed-out beside it

    Pat the area dry with a fresh white cotton cloth. Then walk away. Let the panel air-dry for at least thirty minutes - longer in monsoon humidity, when the leather will need an hour or more. Never use a hairdryer, never aim a fan at it, never put it in direct sunlight. Rapid evaporation cracks the finish coat permanently and leaves the surface brittle for years afterward.

    Tools - Patience. A clock. Fresh cotton cloth. Faridabad / Delhi NCR humidity matters - read the local manual if it is July to September.
    If it didn't work

    If after thirty minutes the leather still feels cool and slightly damp - normal in monsoon - extend to ninety minutes. If after ninety minutes a darker patch remains where the worked area was, that is residual moisture, not damage. Continue waiting; do not condition until the leather feels exactly as warm and dry as the surrounding hide.

  6. 06 5-10 min Always

    Recondition the worked area

    Microfibre cloth with small bead of pH-neutral leather conditioner, buffing in small circles

    Once the leather is fully dry and at room temperature, apply a small bead of pH-neutral leather conditioner to a microfibre cloth. Buff into the worked area in small overlapping circles, then feather outward into the surrounding leather so there is no visible boundary. The alcohol stripped a fraction of the natural lipid layer; you are restoring it. Less is more - excess conditioner sits on the surface and attracts dust.

    Tools - pH-neutral leather conditioner, microfibre cloth Skip silicone-heavy "leather shines" - they form a film that yellows over months.
    If it didn't work

    If the worked area looks slightly darker than the surrounding hide after conditioning, do not panic - this fades over twenty-four hours as the conditioner absorbs. If after a full day the patch remains visibly different, you have a finish-coat dulling that needs studio refinishing rather than home conditioning.

What you should see when you stop

A leather panel restored to even colour and sheen after the protocol

Success looks like

No visible ink line, even at oblique angles. The worked area matches the surrounding leather in colour and sheen within 24 hours. No dry, dull, or stiff patch where the swab passed.

A faint shadow of an old ink line remaining on otherwise restored leather

Partial - acceptable

A faint shadow remains where the original line was - visible only in raking light. No halo, no pigment lift, no roughness. This is the realistic best case on aniline and most dried ink.

A pale halo and dry patch where over-cleaning lifted pigment along with ink

Stop now

A pale halo, a fuzzy edge, or a dry rough patch where you swabbed. Any of these mean the protocol has reached its limit and is starting to lift pigment instead of ink. Stop, photograph it in daylight, and send it to us. This is fixable in the studio.

Section 05 - Inventory

What sits on the bench. Six things, no more.

Ink removal does not need a toolkit. It needs the right six items in the right order. Almost everything here is in a Faridabad chemist or kirana shop within a kilometre.

01

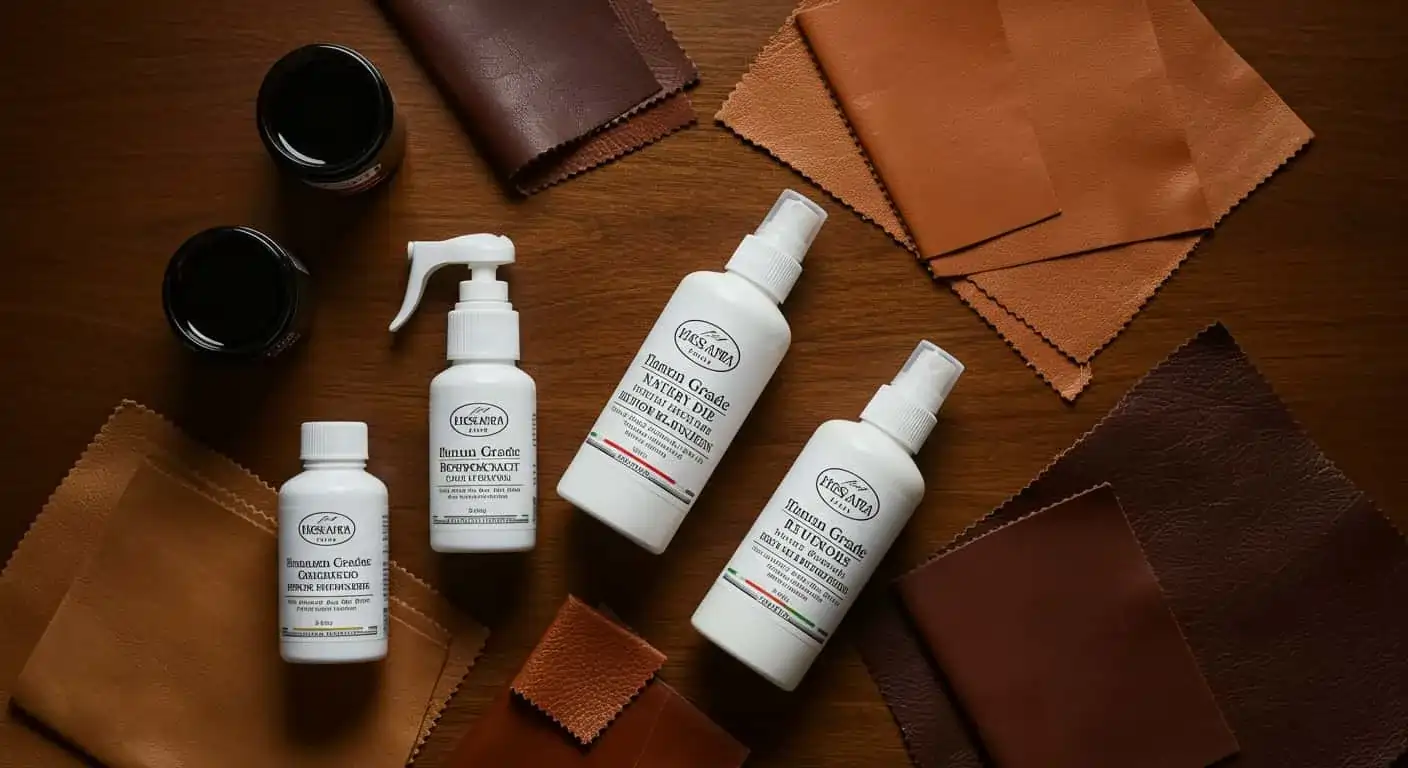
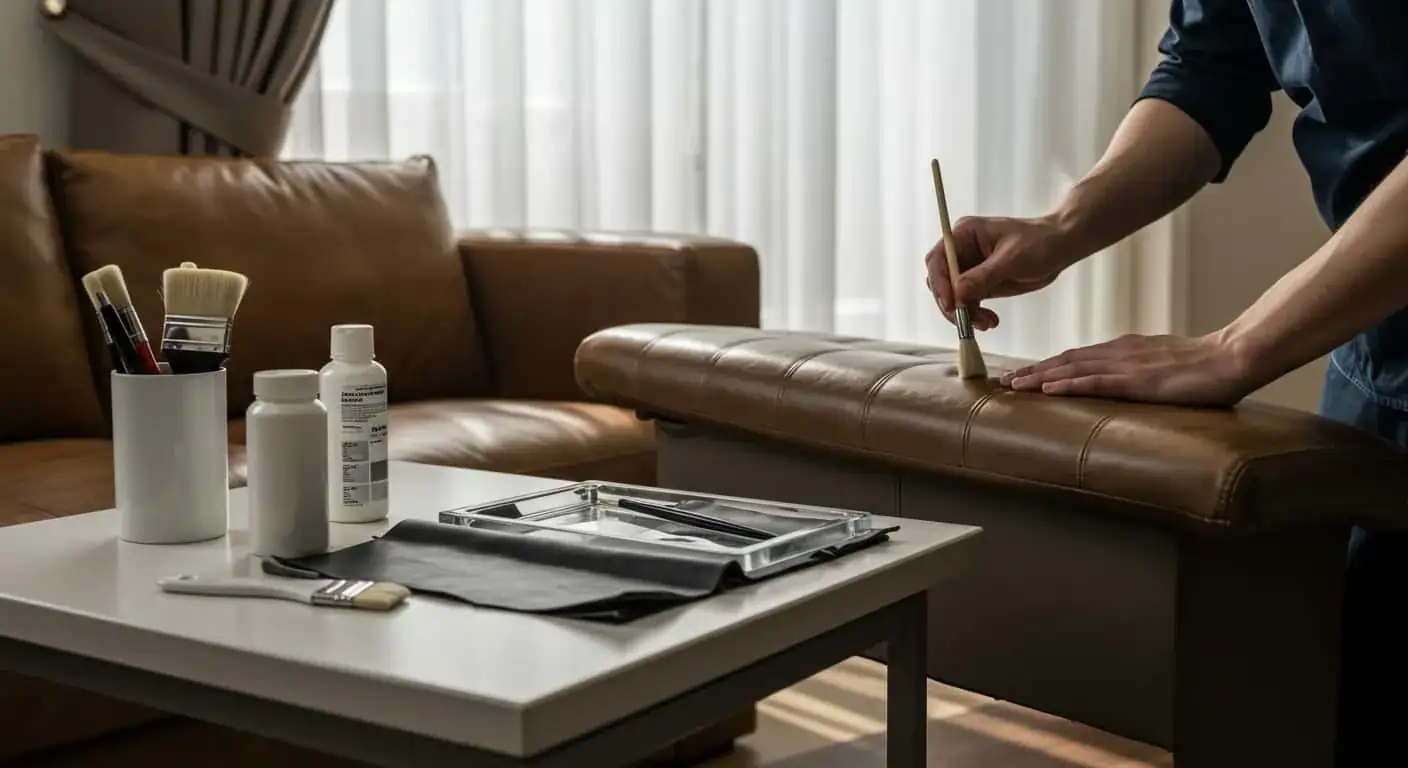
70% Isopropyl Alcohol

The single active solvent in this protocol. Strong enough to break the dye-polymer bond, weak enough that a brief dab does not strip pigment. Stronger concentrations (90%+) flash too fast and over-strip.

Substitute - 70% medical rubbing alcohol from any chemist Source - Pharmacies, lab-supply, online In India - Apollo / 1mg / chemist counter, Rs 80-150 for 100ml. Avoid surgical spirit (denatured, contains methylene blue).
02

Cotton Swabs - 100 pack

Single-use, rotated constantly. The whole reason this protocol works is that you discard each swab the moment it picks up colour, never letting dye redeposit.

Substitute - Tightly twisted cotton on a toothpick In India - Johnson's earbuds at any kirana / Bigbasket, Rs 50-90 for 100. Buy two packs.
03

White Cotton Cloth

Used for blotting wet ink (Step 1) and the neutralising wipe (Step 4). White only - coloured cloths transfer dye onto already-wet leather.

Substitute - Old plain white t-shirt, cotton handkerchief In India - White muslin (malmal) from any cloth shop, Rs 60-100 / metre. Cut into 30 cm squares.
04

pH-Neutral Leather Conditioner

Restores the lipid layer the alcohol stripped. The hardest item to source well in India - most "leather conditioners" sold cheaply are silicone polishes that yellow over time. Buy one trusted bottle and it lasts years.

Substitute - Lanolin-based saddle cream (sparingly) Source - Specialist leather-care brands In India - Amazon / Furniture Clinic / Leather Honey via cross-border, Rs 1,200-2,500. Or WhatsApp the studio for what we use in-house.
05

Distilled Water

For the Step 4 neutralising wipe. Distilled, not tap, only because tap-water minerals can leave faint scale on dark hides. On tan or beige leather, tap is fine.

Substitute - Cooled boiled tap water In India - Battery / iron-water bottles at any kirana, Rs 30-60 per litre. Bisleri also works.
06

Microfibre Cloth

Used only at Step 6 for buffing conditioner. Microfibre carries less lint than cotton and feathers conditioner more evenly into the surrounding leather.

Substitute - Soft microfibre car-detailing cloth In India - 3M / SuperPlush at Bigbasket / Amazon / auto-spares, Rs 80-150 each. Wash before first use.
The Leather Restorators - cross-grain detail of restored aniline leather
Studio - Faridabad - India Fourteen Years on the Bench

Every hide tells you
what it can take.

Aniline forgives nothing. Pigmented forgives almost everything. Reading the leather before reaching for a cleaner is the one habit that has saved more sofas than any product on the shelf.

Photographed in studio - The Practice
Section 06 - Hide Matrix

What ink does to your kind of leather.

The same ballpoint mark behaves five different ways across the five common leather finishes. Find your row first. Your odds, and your next step, depend on it more than anything else on this page.

30 sec

Not sure what kind of leather you have? Three quick tests.

Pick a hidden patch (back of seat-back). Run all three tests, then read the matrix below for your type.

  1. 01

    Water-drop test

    Place a single drop of water on the surface. Soaks in within 30 seconds = aniline. Beads and sits on top = pigmented or bicast. Slow darken with eventual absorb = semi-aniline.

  2. 02

    Fingernail-press test

    Press a fingernail into the leather for two seconds, release. Mark stays then fades slowly = aniline / semi-aniline. No mark at all = pigmented or bicast (top-coat hides the indent).

  3. 03

    Sheen and grain test

    Look across the surface at a low angle in daylight. Uneven natural grain, soft matte sheen = aniline. Plastic-like even sheen, perfectly uniform grain = bicast or heavily pigmented PU-leather.

Still unsure? WhatsApp a close-up photograph in daylight to +91 98915 96597 - identification is free.

Hide Class Risk How It Behaves Verdict
Aniline Severe No topcoat. Solvent-borne dye soaks straight into the corium within minutes. Halo bleeds 2-4 mm beyond the visible line. Alcohol patch-test usually fails - cleaner lifts pigment. Blot only. Skip alcohol entirely. Photograph and send to the studio for dye-correction.
Semi-aniline Moderate Light topcoat. Ink penetrates the topcoat within 5-10 minutes. Patch-test usually passes if leather is in good condition. Partial recovery realistic. Run the full protocol carefully. Expect 60-80 percent visual recovery.
Pigmented Low Heavy topcoat blocks ink penetration for 15-30 minutes. Mark sits mostly on the surface. Patch-test passes reliably. Full removal is the norm if caught fresh. Run the full protocol confidently. Most pigmented sofas recover 95-100 percent.
Nubuck / Suede Severe Open nap absorbs ink instantly. No topcoat to protect. Alcohol on suede flattens the nap permanently and creates a glossy patch where you cleaned. Stop. Do not apply liquids. Use a suede block dry, then send to a specialist nubuck cleaner.
Bicast / Bonded Moderate PU-coated, so ink sits on the polymer skin. Removes easily, but the skin is brittle - aggressive rubbing flakes the coating off in patches. Light touch only. One pass with a damp swab is usually enough. Stop early.

The single biggest predictor of ink-removal success is which row of this matrix your sofa sits in. Most premium furniture made in the last two decades is semi-aniline or pigmented - the two best-case rows. Older European pieces, Italian hides marketed as "natural" or "vintage," and most modern boutique brands lean aniline. A short read on the three finish classes separates them in under three minutes if you are unsure.

Bicast and bonded "leather" - common at price points below Rs 60,000 in India - look like leather but behave like plastic. The good news is ink rarely penetrates the polymer skin; the bad news is the skin itself peels in sheets if treated like real hide. The bicast / bonded explainer covers the failure modes you are trying to avoid.

Section 07 - When DIY Stops

When to step back and call us.

There is a point on every stain where home methods stop helping and start harming. Recognising that line early is the most important call you make, and there is no shame in stopping.

Most home cleanings fail at the same place. People see partial progress, assume a little more pressure or a stronger solvent will finish the job, and cross from lifting ink into lifting pigment. The leather ends up looking worse than when they started. The vinegar-and-olive-oil "household trick" is the most common version of this story, a folk remedy that has cost more sofas than ink ever has.

If you have worked through all six steps and the mark is still visible after twenty-four hours of full-dry rest, you have reached the boundary. Past that point, the answer is dye-correction in a studio: colour matching the original hide, laying down a thin new pigment film, and re-finishing the area so it disappears into the surrounding panel. We do this every week. It is unglamorous but routine, and it is not a home job.

There is no need to commit to anything yet. Send a daylight photograph on WhatsApp and we will tell you honestly whether it is recoverable, whether home methods can still help, and what we would do if it came to the studio.

Stop and photograph if you see

  • !A pale halo around the original mark. That is pigment lift, not residual ink, and pushing harder will make it worse.
  • !The leather feels rough, dry, or stiff where you worked, even after conditioning.
  • !The ink line has spread into a fuzzy cloud instead of reducing. Solvent has carried dye outwards.
  • !Cracks or fine lines start to show in the finish coat where you swabbed.
  • !Colour transfers onto a fresh swab dampened with plain water. This means the topcoat is starting to fail.

"

The fix for an ink stain is almost always less aggressive than people think. By the time someone calls us, half the damage is from what they tried, not from the pen.

- Tyson, Lead Artisan

Section 08 - Aftercare

After the lift - how to keep it gone.

For the next two weeks, the spot you cleaned is slightly more delicate than the rest of the sofa. A little care now is what keeps a one-time stain from becoming a recurring one.

The alcohol that lifted the ink also took a small amount of the natural lipids out of the finish coat. For the next fourteen days, the worked area is a little more porous than the leather around it, meaning a second spill in the same spot will set faster, and deeper, than the first one did. Think of it as a freshly healed scab.

Routine conditioning every six to eight weeks with a pH-neutral product is the simplest insurance you can buy. The full furniture-care guide walks through frequency, product choice, and timing across Indian climate cycles. Condition four times a year and patch-test once before any new cleaning product touches a new spot, and your hide will outlast most of the people in the house.

The other half of prevention is unglamorous but cheap. Move the pen-cup off the side table. Cap the gel pens. Tell the kids that felt-tip is for paper, not "for everywhere." The single most effective ink-prevention measure on any sofa is a small tray on the side where pens collect during phone calls.

Prevention Protocol

  1. i

    Recondition at week 2

    The worked area needs a second light condition exactly two weeks after the first. This re-seals the lipid layer fully.

  2. ii

    Audit the pen perimeter

    Walk the sofa. Move pen-cups, remove uncapped pens from cushions, swap to retractable models that close when dropped.

  3. iii

    Patch-test before any new product

    For two weeks after ink removal, treat the worked area as the patch-test zone for any new cleaner, conditioner, or polish you bring home.

  4. iv

    Quarterly full-sofa condition

    Four times a year, condition the whole sofa - not just stained spots. Even hydration prevents the patchy aging that makes future stains stand out.

The Leather Restorators - restored vintage leather sofa in a Delhi NCR drawing room
The Long View On Living With Leather

A sofa is not a stain.
It is the years around it.

The mark you fix today fades into a decade of evenings. Routine conditioning, a cap on the gel pen, a soft tray for the pens that wander - small habits keep an heirloom an heirloom.

Photographed in client home - Delhi NCR
Section 09 - Questions

Everything else people ask.

01Can I use hand sanitiser to remove ink from my leather sofa?+

Hand sanitiser is 60-70 percent isopropyl alcohol with added gel, perfume and glycerin. The alcohol will lift ink, but the gel residue dulls the finish and the perfume oils stain pigmented leather. Use plain 70 percent isopropyl on a cotton swab instead - it costs Rs 100 at any chemist and contains nothing else.

02Will hairspray remove ballpoint pen from leather?+

It works once or twice on cheap pigmented leather and ruins everything else. Modern hairsprays contain plasticisers and fragrances that bond into the topcoat and leave a sticky halo that attracts dust permanently. Skip it - the cost-benefit is bad on any leather you care about.

03How do I remove permanent marker from a leather sofa?+

Permanent marker uses a solvent dye that bonds with the topcoat itself, not just the surface. Fresh marks (under one hour) can sometimes be lifted with the isopropyl protocol on this page. Anything older usually requires colour matching and pigment touch-up - photograph it and stop before you spread the bleed.

04Does ink come off aniline leather?+

Rarely fully, and never quickly. Aniline leather has no protective topcoat, so dye soaks straight into the corium within minutes. Fresh ink (under five minutes) can sometimes be drawn out with a poultice. Set ink almost always requires professional dye correction.

05Can I use nail polish remover on ink stains?+

Acetone strips leather pigment and finish coats on contact. It will lift the ink and a circle of colour around it, leaving a bleached patch worse than the original stain. Never use acetone, nail polish remover, paint thinner or petrol on a leather sofa.

06Are baby wipes safe for ink on leather?+

No. Baby wipes contain preservatives and surfactants that lift surface pigment along with the ink, leaving a paler smear that grows every time you wipe. We have rebuilt dozens of sofas where the wipe damage was worse than the stain.

Section 10 - Connected Reading

Around the Atlas - where ink meets the rest.

Ink belongs to a small family of solvent-bound stains where chemistry beats elbow-grease, and the surrounding context decides almost everything. If your hide is aniline, the aniline preservation guide is the prerequisite reading - it explains why even mild solvents can lift colour, and why hides this porous reward patience over chemistry. For a deeper map of finish layers and how they fail, the anatomy-of-a-hide piece shows you the cross-section the protocol is working through.

Two adjacent stain pages will save you a search later. Oil and grease stains share the "solvent-carrier, then dye" logic but with lipids in place of dye - the protocol there starts with a poultice rather than a swab. Red wine sits at the opposite end of the chemistry: tannin-bound, water-soluble while wet, polyphenol-bound once dry. Knowing which family a stain belongs to is half the battle, and why saddle soap is the wrong answer for almost all of them is short reading worth the eight minutes.

If you live in Delhi NCR, monsoon humidity changes the protocol slightly - the monsoon leather manual covers the local variables. And if any of this leaves you wondering whether your sofa is restorable in principle, the revival guide walks through the four-stage assessment we use in the studio. Together these threads explain why ink is rarely the worst thing that could have happened to a leather sofa, and why the wrong instinct in the first ten minutes is the thing to avoid.

When the Atlas isn't enough

Some stains have moved past the page.
Send us a photograph.

If the steps stalled, if a halo appeared, or if the ink was already there when the sofa came home, send us a daylight photograph on WhatsApp. We will tell you honestly whether it is recoverable, what we would do, and roughly what it would cost. No commitment, no pressure. Faridabad studio, Pan-India by photograph.

WhatsApp the Studio